The following will demonstrate how to configure the SonicWALL VPN client on Windows 7 and 8 computers. The SonicWALL VPN client has replaced the Cisco AnyConnect VPN client.
1. Go
to > Programs > SonicWALL Global VPN Client.
> Programs > SonicWALL Global VPN Client.

2. If
you receive this message, click Unblock.

3. Click
Next.

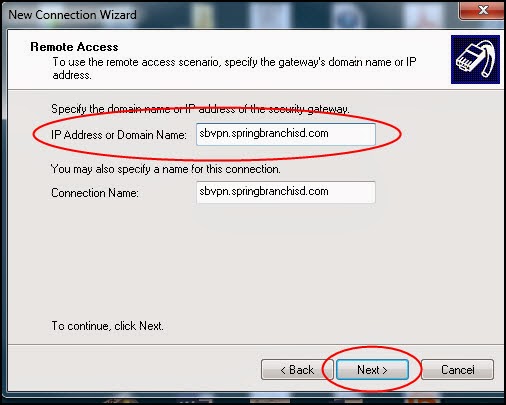
4. Select
the Remote Access option, then click
Next.

5. Click
your mouse in the IP Address or Domain
Name field and type in sbvpn.springbranchisd.com then click Next.
6. Place
a check in both boxes then click Finish.

7. If
you receive this message, click OK.

8. Click
Enable to establish the VPN
connection.

9. If
you receive this message, click OK.
10. A
shortcut icon will now appear on your desktop. Double click on this icon to
start VPN.


No comments:
Post a Comment